Box.com provides a secure method to store your files. Please DO NOT email files that contain sensitive information. Simply save your file(s) to your Box account. The Box account will also store all month financial statements, bank statements, tax returns, and everything else fiscally related to your business.
Upon acceptance of a proposal for services, the primary representative will immediately receive an email invitation from box.com (image 1) containing the basic file structure (image 2 & 3). Throughout the onboarding process, this will be the primary location to save requested information (i.e. previous tax returns, etc.).
Image 1 – Email invitation to access the Box account
Image 2 – Basic file structure for YOUR COMPANY
Image 3 – File structure for yearly folders
Click & Drag file transfer from folder to online Box account
Upload new file from online Box account
Monthly accounting clients should try to maximize the use of Hubdoc to submit receipts, bills, invoices into the accounting systems. Hubdoc allows users to scan receipts via the mobile app or forward pictures or .pdf files via your inbox. There is no need to retain “shoeboxes” of receipts – simply submit financial documents via Hubdoc to be recorded into the accounting system.
The primary contact for monthly accounting services will receive an invitation to join Hubdoc (image 4) during the onboarding process. Each Hubdoc account will have a semi-personalized email address to email documents.
Image 4 – Sample Hubdoc invitation
Receipts/Invoices/Documents can be submitted in a variety of ways: drag and drop, email, or via mobile app.
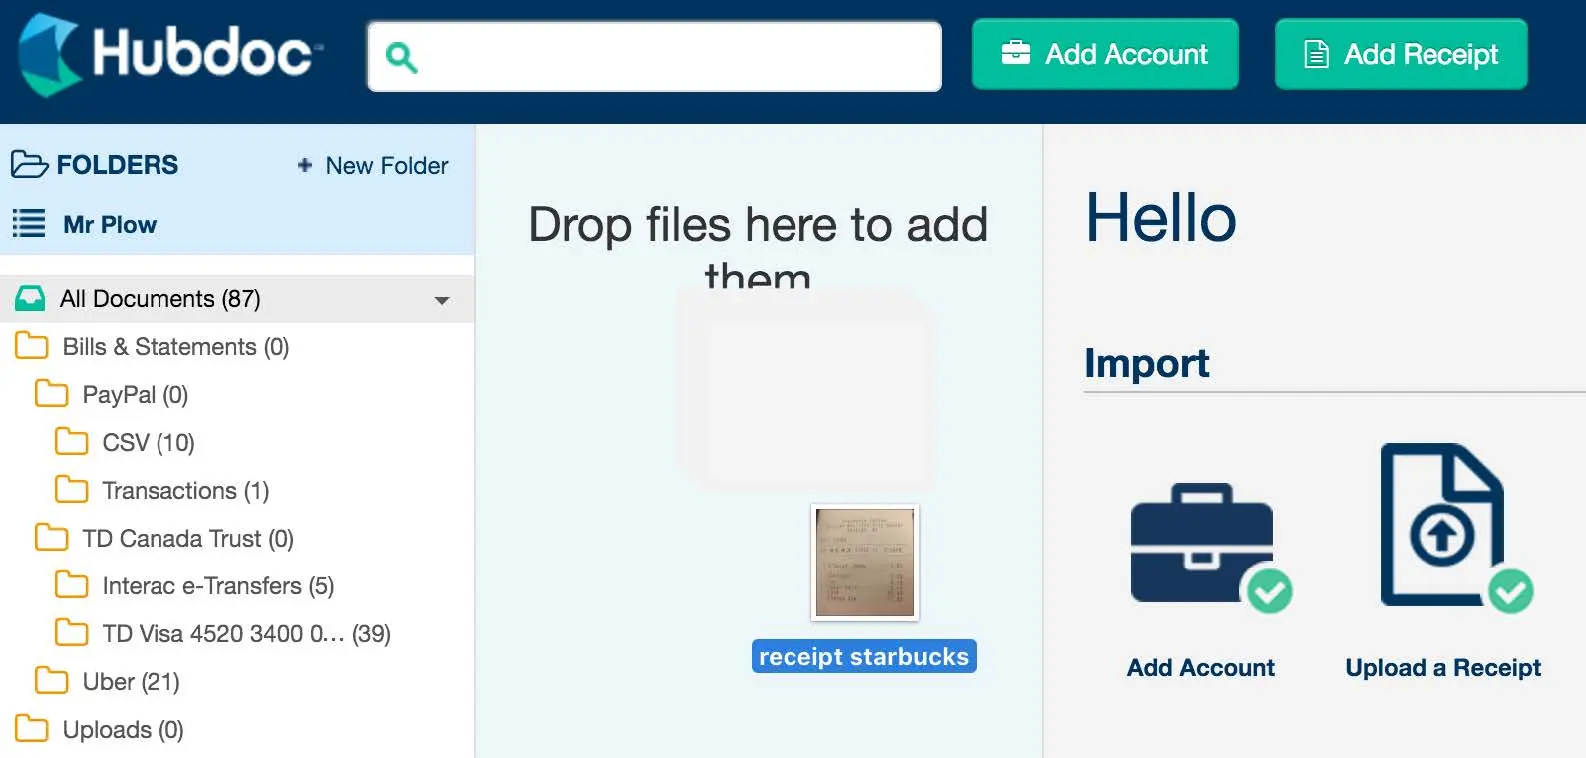
Receipts can be dragged and dropped straight into the document column in Hubdoc directly from your computer. Simply click “Add Receipt” in the upper right-hand corner and then Drag and Drop files.
Receipts can also be sent via email by clicking “Add Receipt”, then click the “Copy to Clipboard” link by the unique email address for your Hubdoc filing cabinet to forward an email invoice to. To make it easy to forward email documents into Hubdoc, save your unique Hubdoc email address in your Contacts. It is best to have each receipt on a separate PDF when scanning receipts. This helps to keep each transaction separate within Hubdoc.
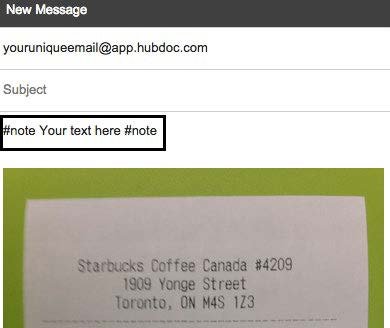
On the Go? You can snap a picture of a receipt and then attach it to an email using your unique Hubdoc address to submit it to Hubdoc. You can attach multiple receipts to an email, but please only have one receipt per picture (Please use the Large image setting on the email if prompted as the image will show up clearer and more legible in Hubdoc.)
You can also use the Hubdoc Mobile App to take a picture using the photo function within the app.
When you are sending documents to Hubdoc via email, you can share any important information by adding a note to the body of the email. Simply type out your message and then enter “#note” to the beginning and end of your message (i.e. #note your message here #note). The note will then attach itself to the top of the source document(s) when forwarded to Hubdoc. Notes are great for things like Employee Reimbursements, Client names for billable expenses, etc. See the image below for example.
Please upload
You will receive a weekly email reminder the day before your scheduled bookkeeping day that will state the following: ”Just a reminder to send your check register and any receipts/checks/documents to Hubdoc by the end of the day today.” Note that documents can be sent at any time that you receive them, but please make sure they are uploaded by the time in this reminder to ensure that we have all the documentation we need to reconcile your books.
This portal is an online management system that allows you to easily and safely send, receive and store all of your accounting and tax information online.
The client portal allows you to review and approve your accounting and tax information with the click of a button. It also allows you to view open and closed requests and any current requests we’ve sent to you.
It’s a safer and more efficient way to handle your accounting and tax. It simplifies the process for you and allows us to serve your individual needs better. It also provides you with more flexibility, you can comment and ask questions directly in the portal. Your accountant is immediately notified and can take action. This eliminates the need for email and keeps it all together in one place, so you can review it at any time.
Follow the process below to:
You will receive an email with your tasks. Click on ‘manage checklist’ to access the tasks you need to complete.
You will automatically see all the tasks assigned to you for completion.
Please note: if you open this link on one device, and you’d like to access it on a different device, click the link again and it will ask you to “Send Access Link”. This will send another link to the originally sent email that will allow you to access it from the computer.
You’ll be able to comment, ask questions and upload files on each of the tasks, which your accountant is immediately notified of and can take action.
Click Comment to comment or ask questions on a task or click upload files to attach files to a task. To add files to a comment click on the paperclip icon on a comment while composing.
By logging in, you’ll have access to all your open and closed requests, including current client requests that haven’t been completed. You’ll also have copies of documents you have uploaded, so you can keep track and easily find what’s been sent.
If you have a login, follow the instructions and log in (example A)
If you don’t have a login click the ‘create account’ button and it will ask you to create an account (example b).
If you forgot your password, click the forgot password link and follow the instructions (example c)
Example A
Example B
Example C
Once you have created an account, you can access the client portal at any time. You can log in using either of the following options: (remove the option you are not using)
Go to our website: (insert website address and placement of link ie and click Client Login in the top right), or
Follow this link: (insert URL from settings) Tip: for ease, add this link to your ‘favorites’ in your internet browser
Once you are signed in, you will be taken directly to the client portal which looks like this.
759 N. Milwaukee St., Suite 203
Milwaukee, WI 53202
This business is growing with Markology.io